Before using the TS-453mini you will need to install a couple of hard drives or SSDs. To begin, remove the four trays from the device and fasten the drives to them. If you're using 3.5-inch hard drives, this is a quick and easy process thanks to QNAP's tool-less design. However, if you're installing an SSD, you'll need to attach it using the included screws. When you are done, insert the trays back into the slots on top of the TS-453mini and lock them into place by pushing down firmly on the levers.

With the hard drives installed, you can now connect the network cable and power cord and turn the TS-453mini on. The server will beep once and then after another 2-3 minutes it will beep again, indicating that it has started up successfully.
Next, you will need to install and configure the software. With the TS-453mini this can be done through QNAP's cloud or by using software downloaded from their website. If you decide to do a cloud installation, you will need the device's "Cloud Key" which is printed on a sticker located on the side of the NAS. Alternatively, you can scan the QR Code located next to the "Cloud Key" with an iOS or Android device to begin installation.
If you choose to do a local installation, you'll need to download and install the QNAP Qfinder software. Like its name suggests, the Qfinder searches the network looking for QNAP NAS devices. When it finds one, it will display its name, IP address, myQNAPCloud device name, server type, firmware version and MAC address.

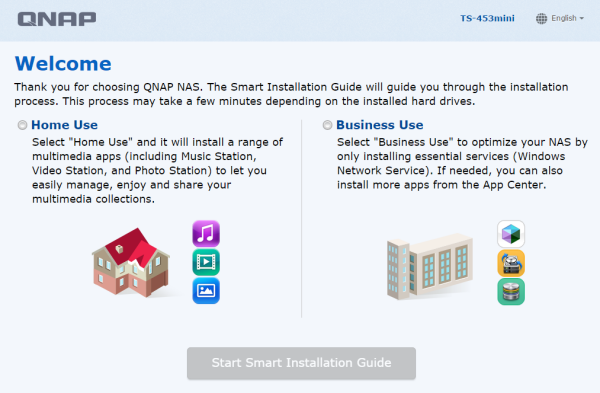
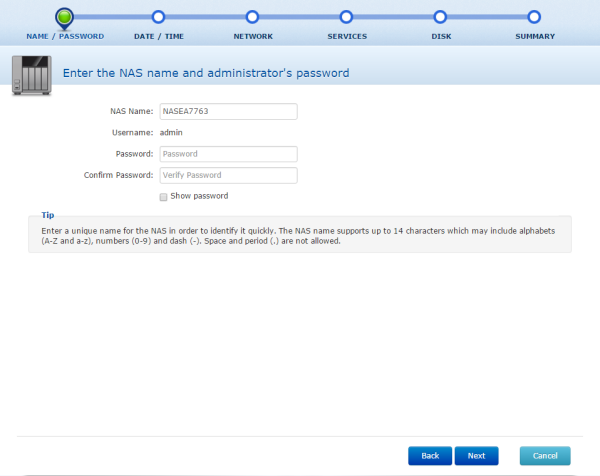
If your device is not configured, Qfinder will give you the option to launch the smart installation guide. To begin, you will need to select whether it will be used for home or business use. This will determine which apps are installed by default. From here, you can change the name of the NAS, enter an admin password, change the date and time, configure the network and select your disk configuration.

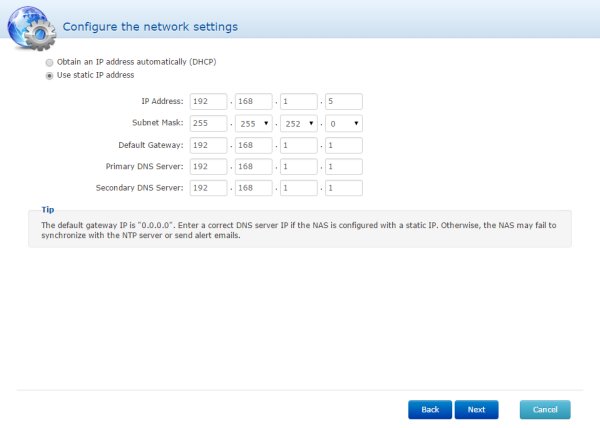


With the network interface configured, you can access the TS-453mini's web-based user interface by entering its IP address into your web browser's address bar. Initially, you will need to login using the default administrator account.
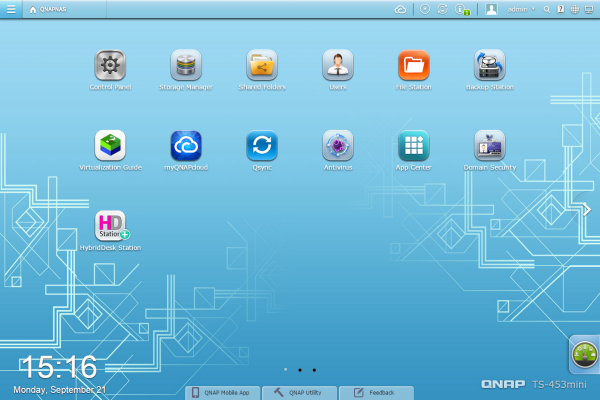
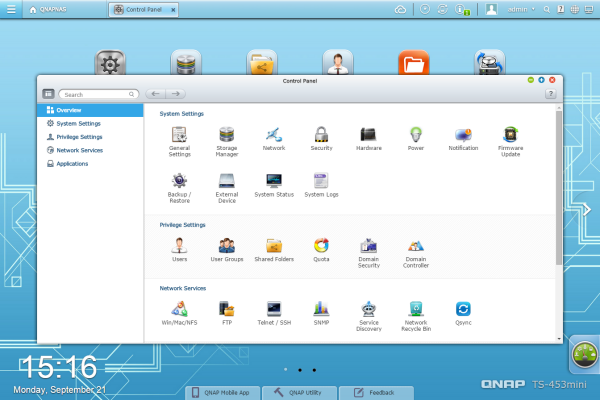
QTS 4.1 is a big step up over QNAP's previous Turbo NAS operating systems. This customizable, multi-window GUI is easy to navigate and lets you do multiple tasks at once. From within the Control Panel, you can manage storage, set user privileges, configure the network services, and use the various business applications to perform backups to another server, external hard drive or cloud based service.
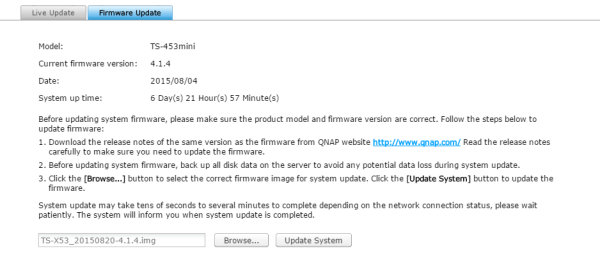
QNAP is continuously improving their NAS operating system. To take advantage of the latest fixes and features, you will need to update the TS-453mini's firmware. This can be done by uploading a firmware image file or through the server's live update feature.