Installing the StarTech's new RAID card is pretty straightforward. To begin, shut down your system, unplug the power cord and open your computer’s case. Next, insert the card in an available PCIe x4 slot and secure it into place. Once that is done, you can connect SATA cables from the card to the hard drives and SSDs in your computer and then close up the case, reconnect the power cord and turn the system back on.
The next step is to install the drivers which are located on the driver CD. If you don't have the CD handy, the latest version of the drivers can also be downloaded from StarTech's website. To install the driver, go into the "Marvell_88SE9230" folder and run "drvSetup.exe." The Setup program will then take you step by step through the installation process.
If you're not going to use the card's RAID or HyperDuo capabilities, there really isn't anything else you need to do. By default, any hard drive or SSD connected to the card will function as an individual SATA storage device.
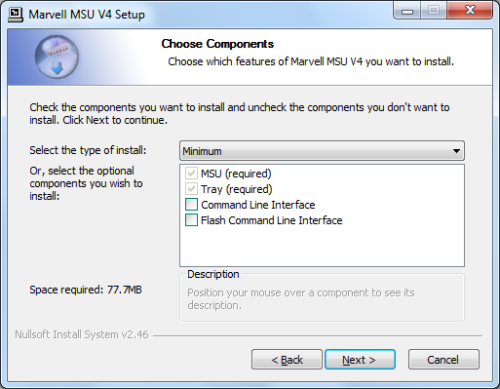
Before creating a RAID volume or HyperDuo virtual disk, you will want to install Marvell's Storage Utility (MSU). This can also be done through the card's BIOS, but it's much easier to use this browser-based management utility. The MSU is included with the drivers but is a separate install.
To open the MSU, double click on the desktop shortcut or the tray application icon. When prompted, login using an account with administrator rights.

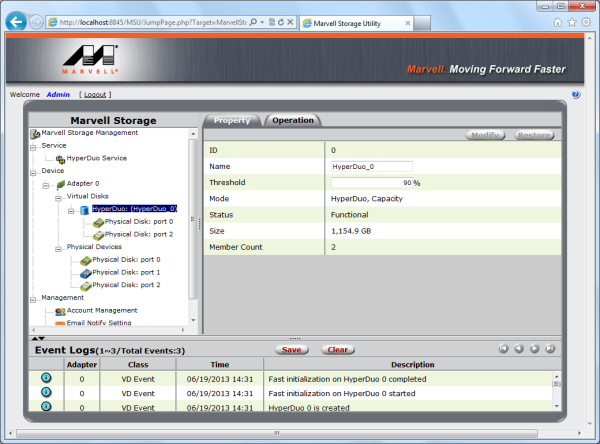
While the look of the MSU is a bit dated, it's very easy to use. The utility uses a tree view to list and show the relationships between the various physical/virtual devices attached to the system.

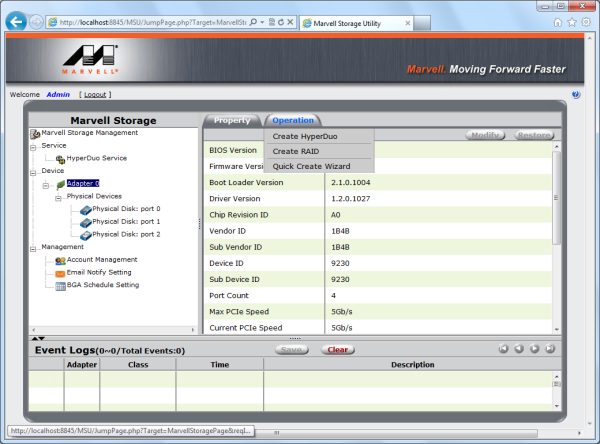
Creating RAID volumes and HyperDuo virtual disks is very easy from within the MSU. Simply select the adapter, and then roll-over the Operation tab to "Create RAID", "Create HyperDuo" or use the "Quick Create Wizard".

Creating a RAID volume is pretty straightforward. If you use the "Create Wizard", the MSU asks whether you want the volume to be optimized for performance or reliability and then create it using some or all available physical disks. Selecting "Create RAID" gives you a bit more flexibility. Along with the ability to manually select which disks to use and the RAID level, you can specify the stripe size and initialization method.

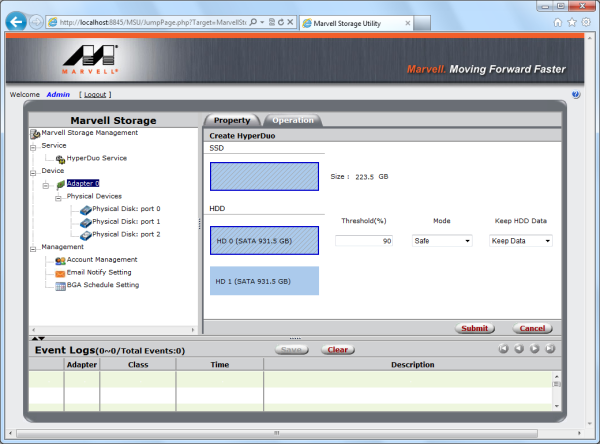
Creating a HyperDuo virtual disk is a bit more involved. To begin, select the physical disks you want to use. Keep in mind that HyperDuo requires at least one SSD for each hard drive. Along with the disks, you will need to specify the mode (Safe or Capacity) and the threshold, which is the percentage of the SSD used to optimize performance. Also, if you're using Safe mode, you can tell it to keep your existing data. However, it can take up to 30 minutes to initialize the disk.
While HyperDuo does a pretty good job of optimizing your data, you can go into the HyperDuo Service and manually select folders and programs that should always be accelerated. Along the same lines, you can specify folders and programs that should never be optimized.


