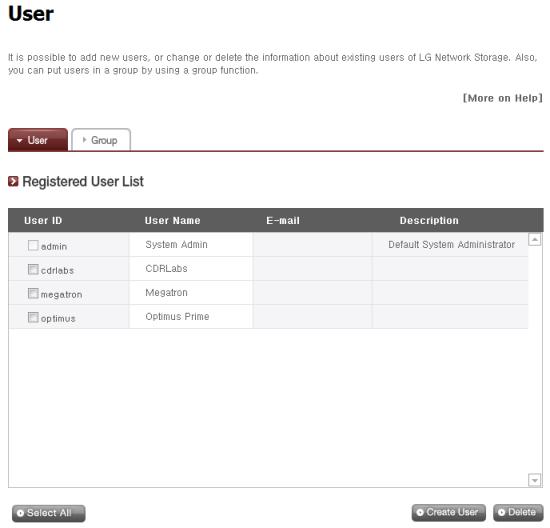
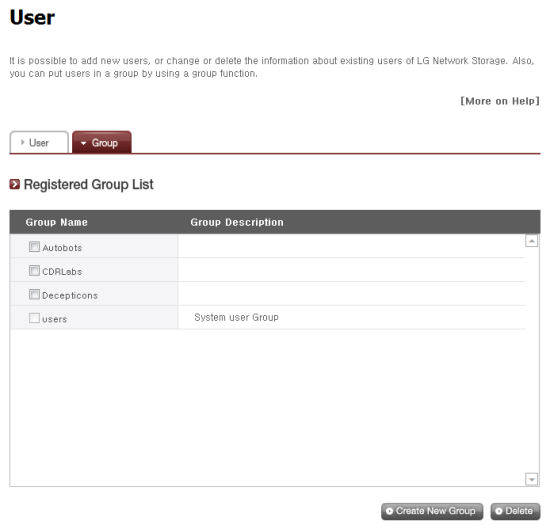
Once you have the N2A2 configured, you'll need to setup the shares and create some users and groups. To manage your user accounts, click on the User option under the Share Settings menu. From here you can view and edit your existing user accounts as well as create new ones.

To create a new user, you'll need to enter a unique user ID and password. To make it easier to manage accounts, you can also enter the user's full name and email address as well as a short description.

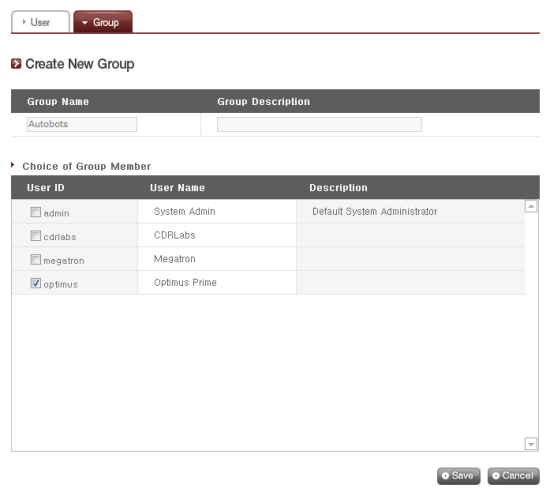
The Group option is pretty straightforward. From here, you can create and delete groups as well as add and remove users.


My only real complaint with the N2A2's user and group management tools is that you cannot give administrator rights to users. If you want to change any settings or create additional new user accounts, you need to login with the default admin account.
By default, the N2A2 has a number of shared folders for things like its DVD drive, services and data backups. You can also create your own using the Share option in the Share Settings menu.
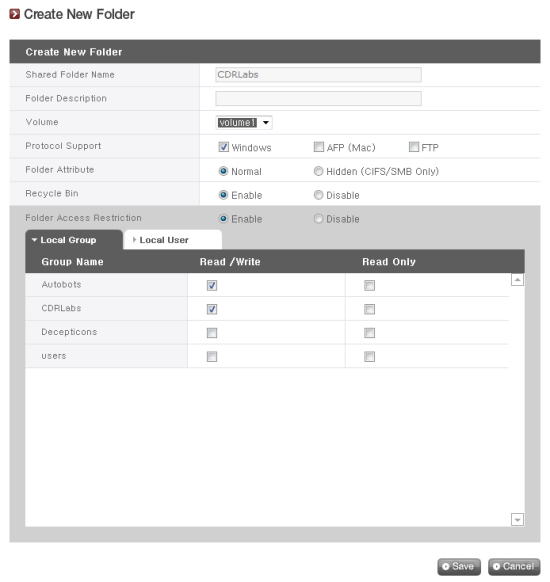
Clicking on the Share option will bring up the screen shown below. From here, you can create and delete folders as well as change their attributes and authorization settings.

To create a new folder, you will need to specify a name, select the volume where it will be created and select the protocols (SMB, AFP, FTP and WebDav) it supports. You can also choose to hide the folder from the network search and create a recycle bin for deleted files.

The last thing you need to do is specify which users and groups can read and write to the folder. These restrictions can also be disabled, giving full access to all users.
The N2A2's sharing capabilities aren't limited to the internal volumes. External hard drives and flash drives attached to its USB port are automatically shared and can be accessed by anyone with an account on the device.


