The My Passport Wireless is ready to go out of the box. The only thing you need to do is configure the Wi-Fi name and password. The first step in setting this up is to turn the device on using the power button. Once the My Passport Wireless has booted up and its Wi-Fi connection is active, you will need to connect to it using your smartphone, tablet or computer. By default, the network name is "MyPassport."
If you're using a computer, you can connect to the My Passport Wireless using your web browser. Otherwise, if you're on a smartphone or tablet, you will need to use WD's My Cloud app, which is available for both iOS and Android devices.

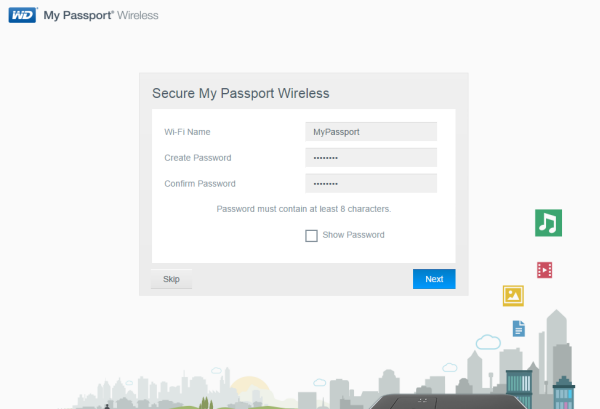
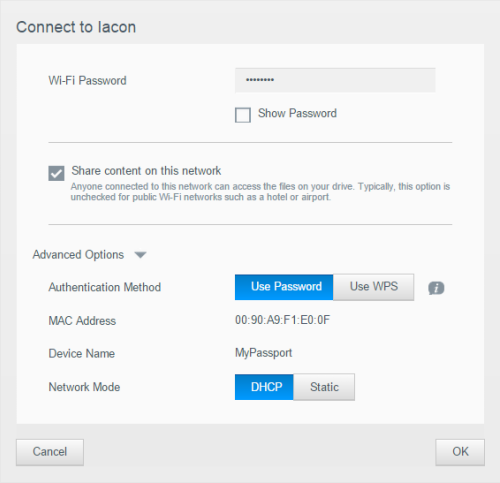
The setup process is pretty straightforward. Once you've accepted the EULA, the My Passport Wireless prompts you for a Wi-Fi name and password. When you are done, the drive will reboot and you will need to reconnect to the drive's Wi-Fi connection using your new password. If all goes well, the dashboard will display and the My Passport Wireless is ready to use.
The My Passport Wireless uses the same dashboard user interface found on WD's network storage products. The Home page provides an instant overview of the device's main functions. Along with the available capacity, you can view the total charge the battery holds and the connection type.
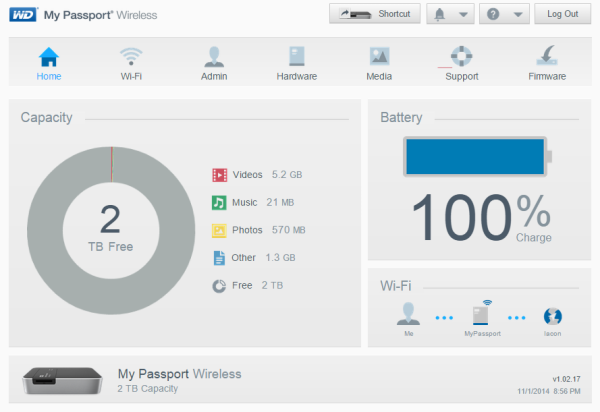
Along the top of the Dashboard is the navigation bar. By clicking on the icons you can open screens where you can configure the devices' Wi-Fi connection, hardware and media streaming capabilities.
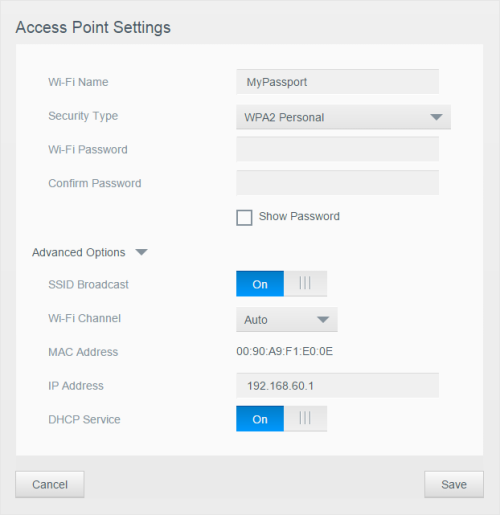
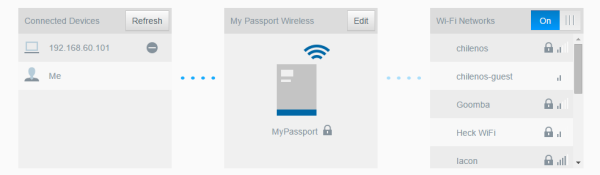
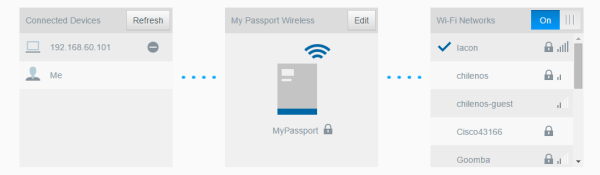
The Wi-Fi screen displays a list of connected devices. From here, you can modify the drive's access point settings including its Wi-Fi name, security type and password. Under the advanced options, you can also specify the Wi-Fi channel, IP address and turn SSD broadcast and DHCP on and off.

The My Passport Wireless can also provide network and Internet access to other devices such as laptops or mobile phones by connecting to another Wi-Fi network. To do so, select one of the available Wi-Fi networks in your area and enter a password if one is required. It also gives you the option to share your content with devices on this network.
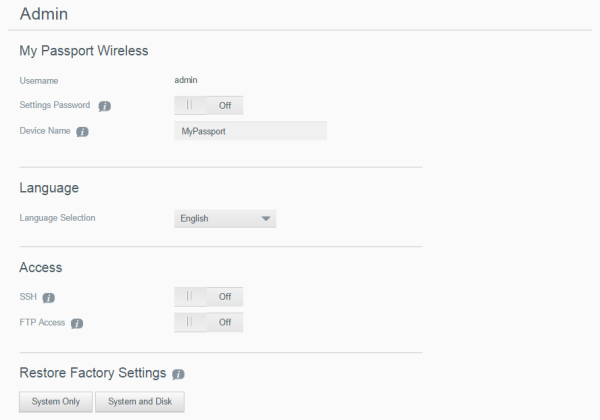
The Admin page is where you can change or set a password to access the dashboard and perform other basic administrative functions. From here, you can also enable SSH and FTP access for troubleshooting purposes and use with wireless cameras.
The Hardware screen allows you to extend the life of the battery or improve the performance of the drive. The My Passport Wireless can also be locked so that it is inaccessible when connected to a computer through its USB port.

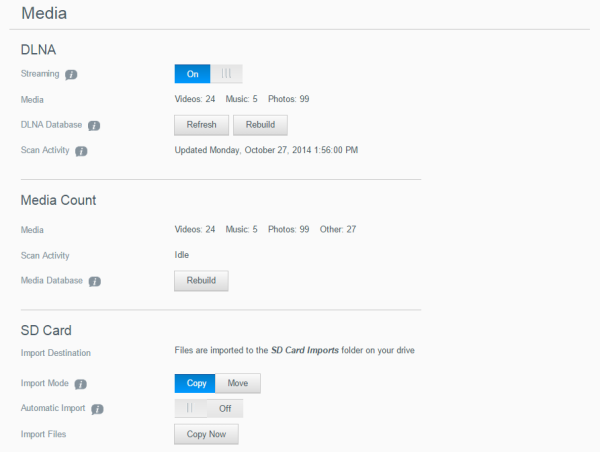
On the Media page you can enable or disable media streaming, refresh or rebuild your media database and see a count of the photo, video and music files on the drive. This page also lets you select the import mode for SD cards. The import can be done automatically or manually using the WPS button on the back of the drive.
The Support page enables you run diagnostic tests and generate system reports to send to Customer Support and gives you the opportunity to join WD’s Product Improvement Program. If you join the program, your drive periodically sends its serial number to WD along with basic drive information.

The Firmware page allows you to automatically or manually check for an update file and then install it. To check automatically and install an available file, the drive must be connected to the Internet.
