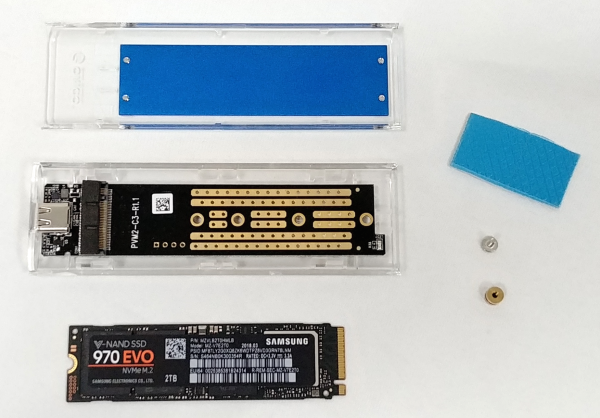
Installing an SSD in Orico's transparent NVMe enclosure is very easy. To begin, press down on the back cover and slide it off. With the cover off, you'll be able to remove the printed circuit board (PCB) from the enclosure.

The next step is to mount the SSD on the PCB. This is done by inserting the drive into the M.2 slot and, using the included hardware, screwing it into place.

With the SSD now attached to the PCB, you can apply the thermal pads and put it back into the enclosure. Once you've slid the cover back into place, you should be ready to go.

If everything goes as planned, you will see a new a storage controller and disk drive within Device Manager. Instead of using the name of the SSD, Orico's transparent NVMe enclosure is identified as a "JMicron Generic SCSI Disk Device."

