The N4B1 LG sent us for this review was ready to go out of the box. However, those that buy one in stores will need to install their own hard drives as well as the system software before the unit can be powered on.
Those handy with a screwdriver won't have any problems installing the hard drives. Simply insert one or more into the hard disk racks and screw them into place. When this is done, slide the racks back into their corresponding slot on the unit.
The next step is to install the system software. To start this process, hold down the ‘SET’ button and press the ‘POWER’ button.

The N4B1 will power on and after approximately 20 seconds the message shown below will appear and the tray will automatically open. Insert the “LG NAS Installer” disc into the Blu-ray drive and push the “DISC OPEN” button to close the tray. The messages “Checking Disc Contents…” and ”Boot from ODD, wait please…” will appear to indicate that the NAS is preparing to organize system files.

After a minute or so, the N4B1 will ask if you'd like to do a default or custom setup. The default option will automatically configure the RAID level, depending on the number of hard drives in the device. Otherwise the custom option will leave things as is so that you can configure the RAID level and volumes through the web interface when the setup process is complete.

It takes about 10 minutes to copy all of the system files over to the N4B1. When all of the system files have been installed, the NAS will automatically reboot. After another 40 seconds or so, a sound will indicate the completion of system set up.

If you chose to do a default setup, the N4B1 will automatically begin the configuration of the volume and RAID. Depending on the number and size of the hard drives, it can take anywhere from 15 to 60 minutes to perform a format and then another 4 to 18 hours to complete the RAID configuration.
Once the N4B1 is up and running, its network connection will need to be configured. If you have a DHCP server on your network and you know what IP the NAS is using, you can skip the next few steps and connect directly to the web menu. Otherwise, you'll need to pop the “LG NAS PC S/W Installer” CD into your computer and install the NAS Detector software.

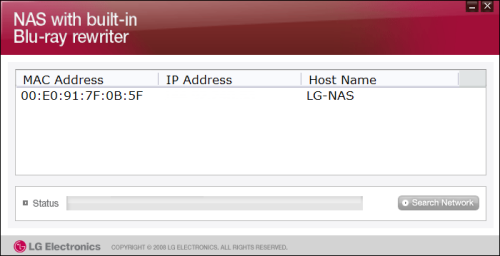
The NAS Detector software searches the network looking for LG NAS devices. When it finds one, it will display its IP address, MAC address and host name. Using the NAS Detector software, you can also change the network information, open the web menu or access the network folder.

If you don't have a DHCP server on your network or a Windows PC capable of running the NAS Detector software, you can use the LCD panel and front buttons to configure the N4B1's network connection. From here you can choose whether or not to use DHCP and, if need be, manually enter the IP and network information.

